Northern Lights Photography
All you need to know
Seeing and photographing the Northern Lights with your own eyes is a magical and unforgettable experience. Of course, it needs a bit of luck to witness this spectacle. Good preparation is very important to ensure that the photos are successful. Our practical tips and tricks will help you to do so.
Download free eBook
Subscribe to our mailing list now and receive our eBook on aurora borealis photography with tips & tricks in practical PDF format.
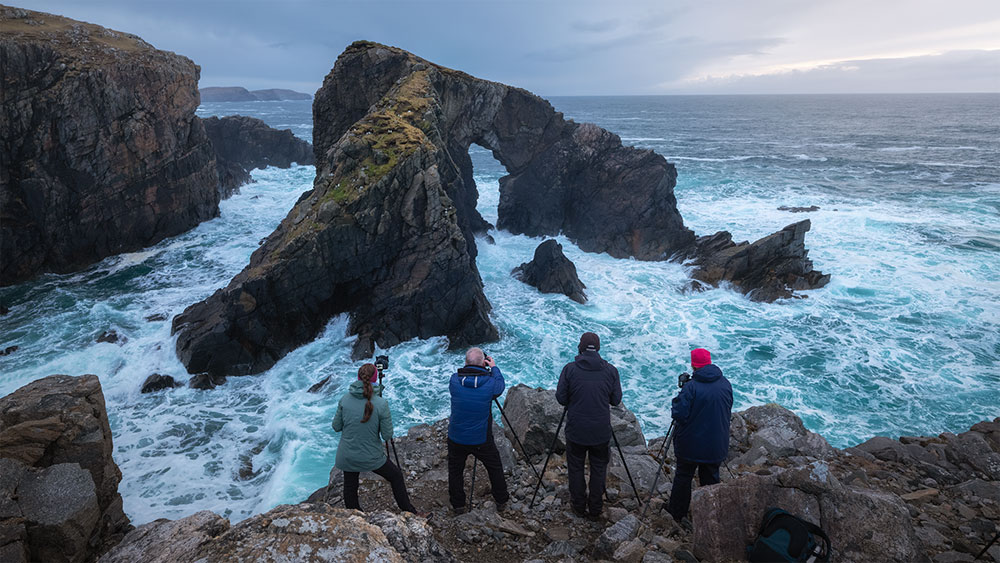
1. Proper preparation is half the battle
Camera Equipment
Use a camera with manual setting options (e.g. SLR, bridge or system camera) that is well suited to taking low-noise shots at high ISO values.
Use a light-sensitive wide-angle lens with an aperture that can be opened up to f/1.8 or f/2.8. This allows you to capture a wide angle of view and work with faster shutter speeds thanks to the open aperture.
Checklist: Make sure to have this gear with you
- A sturdy tripod
- Single lens reflex, bridge or system camera
- Fast wide-angle lens, e.g. f/1.8 or f/2.8
- Enough batteries and memory cards
- Cable remote release (alternatively, you can also use the camera’s self-timer)
- Possibly a zip bag as protection against snowfall
- Microfibre cloth

Hamnøy, Lofoten
Nikon Z7ii, Nikkor 14-24mm f/2.8, f/2.8, 4s, ISO 2000

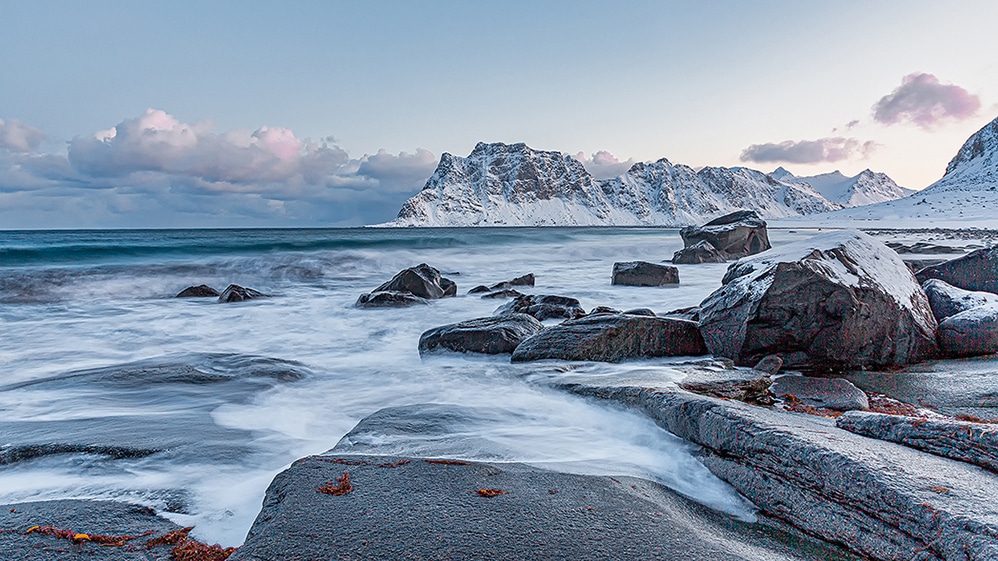
Flakstadøy, Lofoten
Nikon Z7ii, Nikkor 14-24mm f/2.8, f/2.8, 3s, ISO 3200
Take enough batteries with you
In very cold weather, you should always have enough spare batteries for the camera. The batteries discharge more quickly in the cold as well as with longer shutter speeds. Carry the spare batteries close to your body so that they are not exposed to the cold.
Dress up warm
Chasing for Norther lights requires a lot of patience. Sometimes you have to hold out in the cold for several hours. It is therefore important to wear warm and breathable functional clothing in multi-layer principle.
Checklist: This will keep you warm
- Functional underwear for the first layer
- Warm and breathable functional clothing for the middle layer
- A very warm winter jacket (e.g. down, Primaloft etc.)
- Lined ski trousers / winter trousers
- Gloves, e.g. thin gloves and a pair of thick mittens
- Hat and scarf
- Warm winter shoes with appropriate tread soles
- Heat pads for hands and feet
- Spikes for the shoes
- Headlamp
- For your well-being: Thermos flask with hot tea

Flakstadøy, Lofoten
Nikon Z7ii, Nikkor 14-24mm f/2.8, f/2.8, 5s, ISO 3200

Flakstad, Lofoten
Nikon Z7ii, Nikkor 14-24mm f/2.8, f/2.8, 4s, ISO 3200
Study the weather forecast and the aurora boreaelis forecast
To see the aurora borealis, 4 different factors must be right: Darkness, you have to be in the far north under the “auroral oval”, clear skies and eruptions on the sun. The first two factors can be easily solved by travelling to the far north between October and March: for example to Alaska, northern Norway, Finland or Iceland. The last two factors, however, are difficult to plan. It is therefore worth spending as much time as possible on site (a week or more). In addition to the local weather forecast, you should also regularly check the aurora forecast when you are there.
Our link tips for weather and aurora forecast

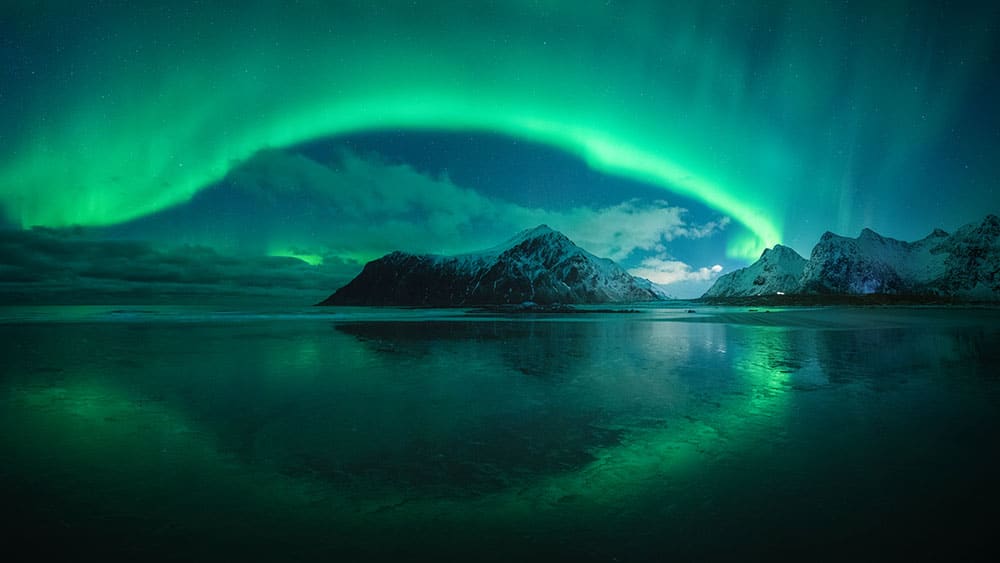
Northern lights on Flakstadøya, Lofoten
Nikon Z7ii, Sigma 14mm f/1.8, f/1.8, 2s, ISO 5000
2. How to spot Northern Lights in the sky
As long as your eyes have not become accustomed to the darkness, it is not so easy to spot the Northern Lights. This is especially true if you are in an illuminated room and looking out of the window. However, as soon as you are in the dark (preferably outside, of course) you will be able to recognise the aurora well.
Not sure if there is a bright cloud or a (faint) aurora in the sky? Your camera sensor is much more sensitive than your eyes. Take a test shot. Is the cloud on the display green? Great, then you are dealing with an aurora borealis. Even with a weak aurora, the camera will show the aurora much greener than you can see it with the bare eyes.
3. Pay attention to the image composition
Photographing just the sky with the auroras can quickly look boring. Create a beautiful foreground into your shot. Create a great landscape shot, e.g. with a beach, the edge of a forest, a hut or a mountain range with the aurora borealis in the background. A foreground in which the aurora can be reflected, e.g. a lake, also looks great.

Skagsanden, Flakstadøya Lofoten
Nikon D850, Sigma 14mm f/1.8, f/1.8, 1.6s, ISO 3200
4. The correct camera settings
Focus
Switch off the autofocus and focus manually. Set the focus on your lens to infinity. Important: be sure to test this once during the day and memorise the setting where exactly your lens is set to infinity. This can vary depending on the lens. In the dark, you can then use a headlamp to focus the lens correctly to infinity. But do not rely on this completely.
Most lenses are rather inaccurate in this respect. We therefore recommend focussing manually using your camera’s Liveview. Look for a bright star in the sky or a distant light source such as a street lamp. Switch on Liveview and zoom in very close to the relevant light source. Then move your focus ring in both directions until your light source in the display is as small as possible. Take a test shot and check whether the stars or the edges of the mountains etc. are in focus.
Image stabiliser
If your lens has an image stabiliser, be sure to switch it off when using the tripod.
Shoot in manual mode
Aperture
Work with an open aperture such as f/1.8 or f/2.8. The more open the aperture, the shorter the exposure times you can use.
Exposure time
The exposure time depends heavily on the surroundings. The moon, any light pollution from nearby villages or even a snow-covered landscape has an influence on the exposure time. The same applies to the strength and intensity of the aurora borealis. A longer exposure time shows the colours of the auroras more strongly. If, on the other hand, you want to freeze the dancing movements of the aurora, you should keep the exposure time as short as possible: preferably under 10 seconds.
Our recommendations
- Start with an exposure time of 10 seconds and then check the histogram. Then correct the exposure time as required.
- If the auroras dance in the sky = short exposure time of maximum 10 seconds.
- If the auroras move slowly = longer exposure time of approx. 20 seconds.

Northern lights on Haukland Beach, Lofoten
D850, Sigma 14mm f/1.8, 6s, ISO 4000
ISO
The ISO value depends heavily on the external conditions. Is there snow in the area? Does the moon light up the landscape? The noise behaviour of your camera, the light intensity of your lens and the set exposure time also have an influence on the ISO.
Depending on the brightness of the surroundings, you should adjust your ISO accordingly. A low ISO setting is generally the best choice. The higher you set the ISO value, the shorter the exposure times you can use. However, this increases the image noise. You have to find the optimum limit between short exposure times and possible image noise.
White balance
White balance can be tricky depending on the situation. You can often achieve good results with automatic white balance. However, if you are in a place with a lot of light pollution, e.g. due to a nearby village or town, your pictures can very quickly take on an orange tone. In such a case, it is worth setting the white balance manually. Of course, you can also correct the white balance during image editing in post-processing.
Our recommendations
- Depending on the type of camera, work with ISO values between 800 and 3200. ISO values up to 8,000 can usually be used with the latest camera models.
- If the auroras are dancing in the sky, increase the ISO so that you can work with a short exposure time of a maximum of 10 seconds.
- If the auroras move slowly = set the ISO as low as possible so that you can set a longer exposure time of approx. 20 seconds.
Check your exposure
After taking the photo, be sure to check the exposure using the histogram. The camera display appears very bright in the dark, as your eyes are now used to the darkness. Even an underexposed or overexposed image can still look good. You can use the histogram to see whether you need to correct the exposure or not.
5. After the successful hunt for northern lights
Protect your camera!
Have you successfully captured your first aurora images? Great! When you go back to your accommodation, make sure that you don’t expose your camera to a temperature shock. This is because an abrupt change from sub-zero temperatures to heated rooms can cause condensation to form in the camera. This can have fatal consequences under certain circumstances. Simply leave the camera in your photo backpack to acclimatise slowly to the heated rooms and only unpack it later.
Image editing
Take photos in RAW format. This allows you to get the best out of your images in post-processing. For example, you can better reduce noise due to the increased ISO.
Fancy an unforgettable aurora adventure?
On our Lofoten photo tours in Norway, you have the opportunity to capture the scenic highlights and the Northern Lights with your camera. Our photo tours are accompanied by renowned nature photographer Cody Duncan. Cody lives in Lofoten and knows the islands like the back of his hand. He will guide you to the most beautiful photo spots and knows exactly where and when to look for auroras. Thanks to his excellent knowledge of the local weather system, our guests have been able to photograph auroras on all our Lofoten photo tours so far.
TO THE PHOTO TOUR LOFOTEN AUTUMN COLOURS
TO OUR LOFOTEN WINTER DREAM

Download free eBook
Subscribe to our mailing list now and receive our eBook on aurora photography with tips & tricks in practical PDF format.

Skagsanden, Flakstadøya Lofoten
Nikon D850, Sigma 14mm f/1.8, f/1.8, 3s, ISO 1250