Photographing the Milky Way Made Easy
A simple introduction with many tips & tricks
To admire and photograph the Milky Way in a clear night is a great experience. In this blog article, we will show you in simple steps how you can create great photos of the Milky Way with just a little bit of practice.

The Milky Way above Steingletscher, Susten Pass
Fujifilm X-T4, Fujinon XF 18-55mm, f/2.8, 30s, ISO 8000
The best conditions for Milky Way photography
In our latitudes, resp. in Central Europe, the galactic centre of the Milky Way is not visible all year round. The “Milky Way Season” lasts from March to October in the Northern Hemisphere. After that, the centre disappears behind the horizon again. Basically, the more north you are, the shorter the Milky Way season and the lower the visibility of the galactic centre.
At the beginning of the season, the Milky Way lies very flat in the sky in the early morning hours. This is the ideal prerequisite to integrate a beautiful milky way arc in your composition.
In the southern hemisphere (e.g. in southern Africa or Australia), the galactic centre is high up during the season and is very visible.
At a glance: the best conditions to photograph the Milky Way
- Visibility of the galactic centre
- A place as dark as possible and with very low light pollution or no light pollution at all
- No moon in the sky (new moon or the moon has already set)
- A clear sky
Be in the right place at the right time – plan in advance
Choose the darkest possible place for your Milky Way photos with low light pollution. You will only be able to admire and photograph the Milky Way in a really dark place. Bear in mind that the Milky Way is in the south. Therefore, you should also think of distant major cities in the south, if you do not want to have light pollution in your pictures.
There are several apps and websites that help you find a particularly dark spot. For example, Dark Site Finder is a helpful address on the Internet.
Also, check the moon dates and times for your planned Milky Way trip in advance. The best nights are moonless nights or nights where the moon has already set.
Another important factor is the weather. In order to photograph the Milky Way in its full splendor, you need a sky as clear as possible. Here you can use the help of various weather apps in order to assess the current situation well.
Pro tip – us the PhotoPills App:
The night AR mode of the app shows you the position of the Milky Way, including where exactly the galactic center is at any time in the live image of your smartphone. This way, you can already plan your composition in advance. You can use the app’s planning tool to get all the data in advance and plan accordingly. The app shows you the times for rising and setting of the sun and moon, stage of the moon phase, the visibility of the galactic center and the state of the Milky Way in the sky.

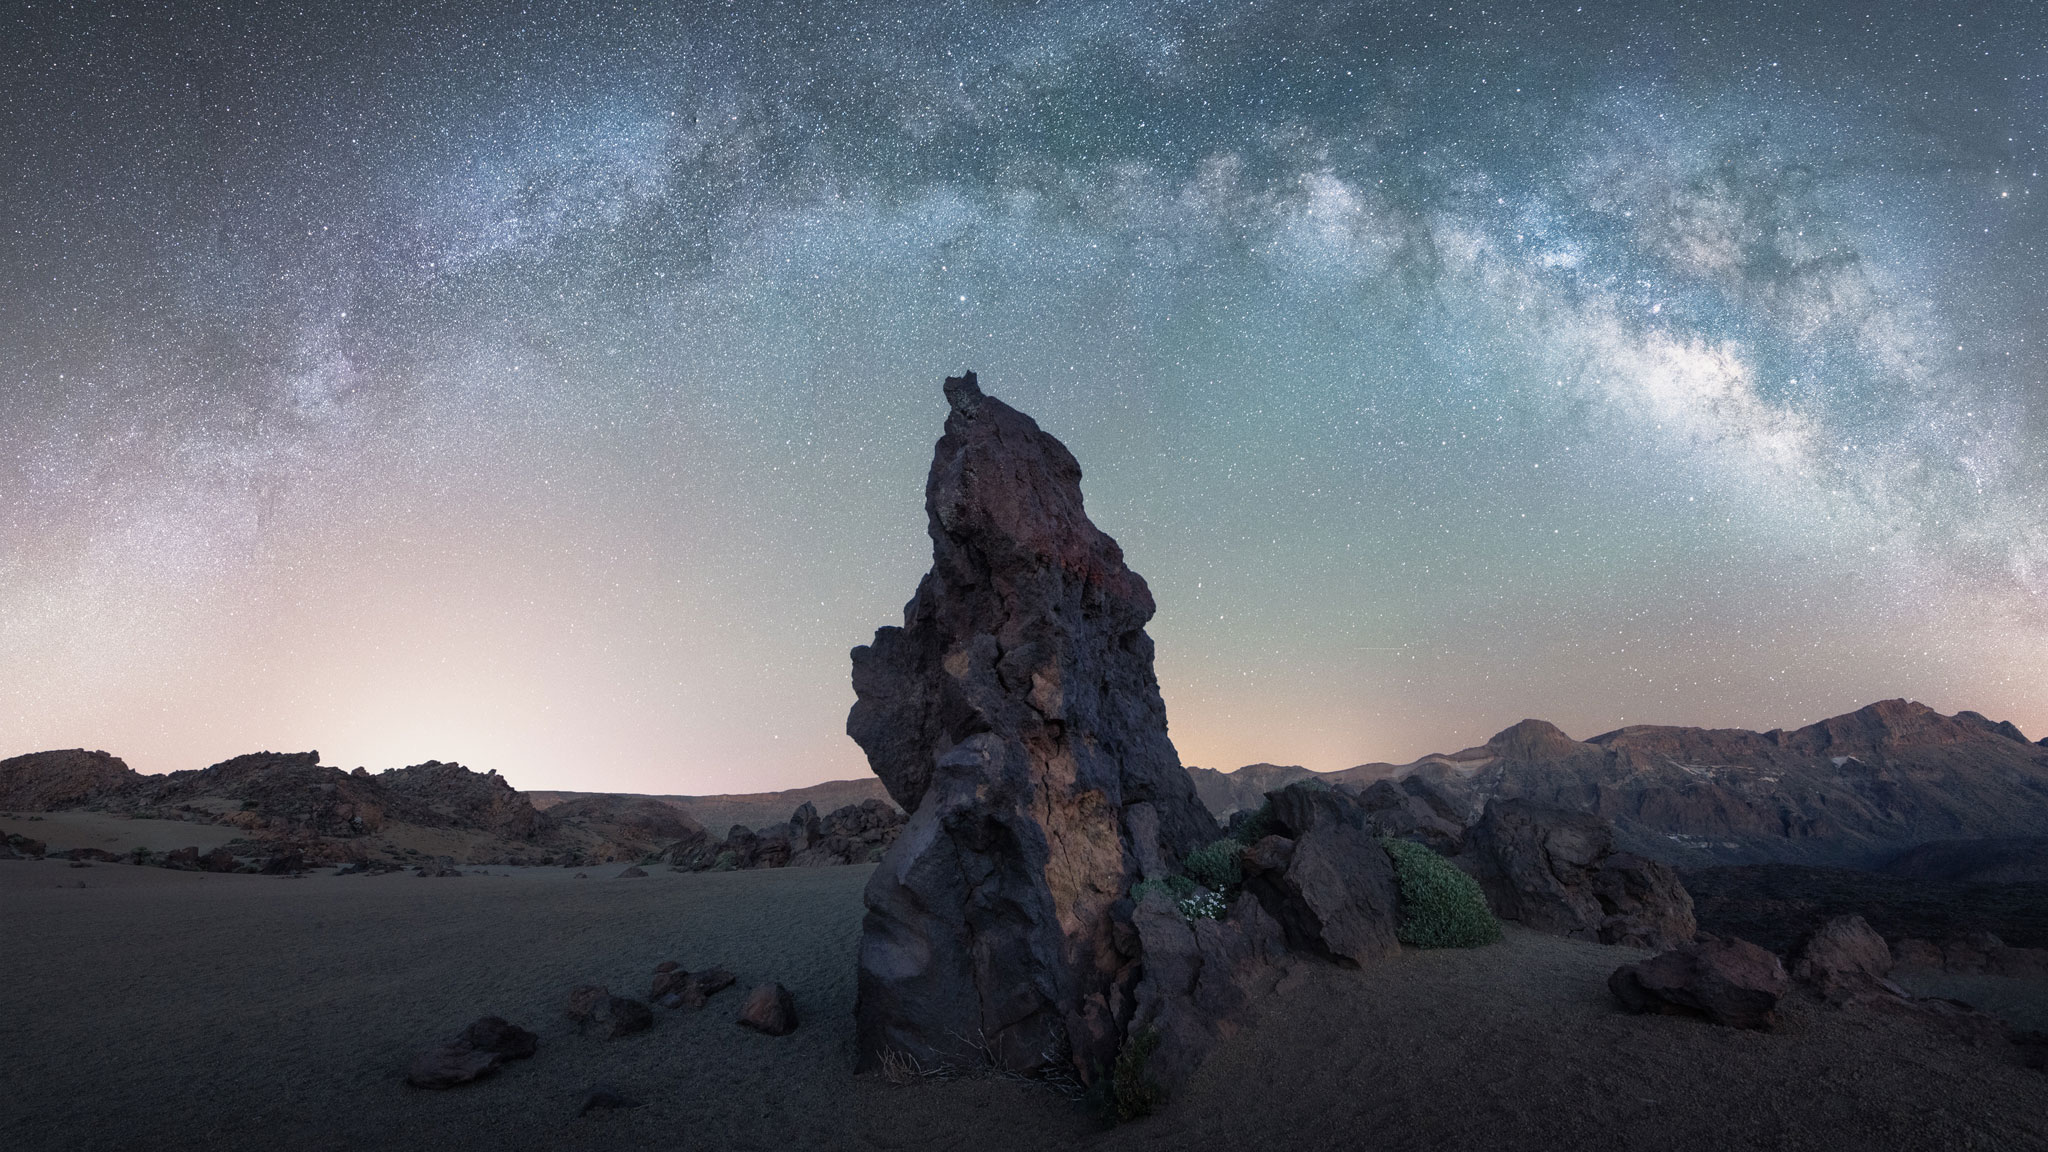
Milky Way above El Teide National Park, Tenerife
Nikon Z7ii, Sigma 14mm, f/1,8, 15s, ISO 6400
The equipment you will need for Milky Way photography
To get good shots of the Milky Way, you need a good DSLR or system camera, a fast lens and a tripod.
Use a camera which produces less noise.
Since as a short exposure time as possible should be used for the starry sky and the Milky Way, a correspondingly higher ISO value must be set. It is of course an advantage if you have a camera that produces less noise. The best results are obtained with a full-format sensor, as they produce less image noise at high ISO values.
Use a wide-angle lens
Use the widest-angle and fastest lens you have. For example, you can capture very good pictures of the Milky Way with a kit lens. The fastest and the widest your lens is, the better the pictures.
The more you can open the aperture, the more light your lens can take in. This is especially important since due to the earth’s rotation, the stars move in the sky. If you expose too long, you will have unpleasant lines in your shot instead of crisp sharp stars. Ideal are lenses with a maximum aperture of f / 2.8 or even f / 1.4.
The focal length also plays an important role. The bigger your composition, the better you will be able to capture the imposing Milky Way in all its glory.
Bring a sturdy tripod and a remote control
Use a tripod as sturdy as possible, which has a good grip in rough terrain and defies wind and weather no matter the weather conditions. In addition to the tripod you should have a remote trigger. It allows you to release the trigger without touching the camera and to capture crisp images. Alternatively, you can also use the self-timer of your camera.
Summary – this is what you need
- SLR or system camera with good noise performance
- Fast wide-angle lens
- Stable tripod
- Remote trigger
- Headlamp or small flashlight
- Warm clothes

The Milky Way above the Monte Rosa massif, Zermatt
Fujifilm X-T4, Fujinon 18-55mm f/2.8-4.0, f/2.8, 25s, ISO 5000
The camera settings: In 8 steps to the perfect Milky Way photo
1. Composition
Think about a great composition and incorporate the Milky Way in it. For example, choose a nice foreground such as trees, a mountain panorama or a single building e.g. mountain chapel. Ponds or lakes in which the starry sky is reflected together with the Milky Way can also be great.
2. Camera Settings
- Manual mode: Make sure you have set the manual mode on your camera. For night photography, you should set the shutter speed and aperture manually.
- RAW format: This will allow you to edit the image optimally.
- Turn off the Image Stabilizer: If your lens has a stabilizer, always turn it off when photographing with a tripod.
- Noise reduction: Consider switching off the camera’s internal noise reduction. Depending on the exposure time, it usually takes a long time before you can take a picture again.
- Mirror Lock-up: If you use a SLR camera, turn on the mirror lock-up. The triggering of the mirror can otherwise also lead to slightly blurry images.
3. Switch off the autofocus and focus manually instead
Focusing in the dark can be challenging. Our tip: Set your lens to infinity and use the live view function of your camera. Zoom in to a very bright star and focus manually. Once your star appears as a crisp point without any shadows or edges on the display, you can assume that you have set the correct focus. Alternatively, you can also look for a small light, e.g. looking for a lantern in the distance or similar and focus on this object.
4. Use a wide aperture
Open the aperture as far as your lens allows, because we want to capture as much light as possible. Therefore, choose the smallest possible f-number. Depending on the quality of the lens, you can use the maximum aperture, e.g. 1.4 or 2.8. With certain lenses, it can be that at the maximum aperture the corners have an unpleasant vignetting. In this case, it is better to slightly close the aperture again.
5. Use the correct shutter speed
The shutter speed depends on the focal length and the sensor size of the camera.
Basically, we want to capture as much light as possible and therefore use a slow shutter speed. But while we are exposing our shot, our planet continues to rotate. This means that if the shutter speed is too long, you will get small lines instead of nice crisp stars on your photo due to the Earth’s rotation..
The 500 rule for the correct exposure
You can calculate an indication for the ideal shutter speed with the 500 rule. With a full format camera, simply divide 500 by the focal length of your lens..
After taking a picture, check in 100% view mode if the stars are really sharp and that there are no small lines. If you already have small dashes in the shot, reduce your shutter speed accordingly.
How to calculate your optimal shutter speed
Full-frame camera
You are using a lens with a focal length of 14mm:
500 / 14mm = 35.7 seconds
Crop camera
With a 14mm lens, you also take into account the crop factor (for example 1.5 at Nikon).
Focal length 14mm x crop factor 1.5 = 21mm
500 / (14mm x 1.5) = 23.8 seconds
6. ISO
In order for you to manage a good exposure with the wide aperture and the calculated exposure time, you should set the ISO value slightly higher. Depending on the noise behaviour of the camera, you can, for example, choose ISO 3200. However, check your results and decide for yourself up to which ISO value you can go so that the noise is still acceptable for you.
7. White balance
You can also adjust the white balance in a RAW file quite well in the image editing. Otherwise it is suitable to use the bulb mode as white balance, or to enter a manual value between 2800-3000 Kelvin.
8. Trigger and check the histogram
After you’ve set everything right, you can trigger the camera. Then check on the histogram if the exposure is correct. Try to illuminate night scenes as far to the right as possible. In order to minimize the noise in the shadows or depths.
Checklist camera settings
- Create your composition
- Use manual mode and RAW format
- Deactivate autofocus
- Turn off the image stabilizer
- Use 100% live view mode and focus manually
- Activate live view or mirror lock-up
- Switch off noise reduction
- Increase the ISO value
- Choose your aperture (the lowest f-number you can go)
- Calculate your shutter speed with the 500 rule
- White balance on artificial light or bulb
- Check histogram
- Zeit mit der 500er Regel berechnen
- Weissabgleich Kunstlicht
- Histogramm prüfen

Starry sky in Galicia, Spain
Fujifilm GFX 50s II, 23mm, f/4.0, 30s, ISO 4000
Editing your Milky Way photos
There are different ways to edit images and, of course, the best option depends on your personal taste. You can either get a lot out of your Milky Way photo in a few steps, or you can invest more time by creating time-blending or focus stacking shots. Here, we would like to show you the basics and give you the most important steps in image editing. We use Lightroom and / or Photoshop for our image editing.
Important: Important: After adjusting, always look at the effects on your photo in 100% view mode and then decide if you are satisfied with the editing or not.
The basic settings on Lightroom
- Check “Remove chromatic aberrations”
- With the exposure control you should now no longer have to make large adjustments if you already paid attention to the correct exposure during the recording.
- Check the white balance and adjust if necessary
- To enhance the Milky Way, you can slightly increase the contrast. At the same time, you can raise the lights and lower the depths a little bit.
- If necessary, move clarity slightly to the right.
- Depending on the subject you can increase the dynamics and slightly push the saturation to the left. This gives the image a bit more colour, but be careful to not oversaturate the image.
- With the gradation curves, you can get a little more contrast out of the picture.
- Under “Details” select a “very strong” mask, so that especially the stars can be emphasized. Now sharpen the picture to your taste.
- Other useful tools are the grad and radial filters for more contrast between the stars and the sky or area correction. With the latter, you can for example only work on the Milky Way.

Comparison before and after: with the most important basic settings in Lightroom you can already get a lot out of your milky way photo
We hope that these tips will make your entry into night photography easier and that you will use it to take pictures of the Milky Way. With a little practice you will definitely achieve great results.

Starry sky in Galicia, Spain
Fujifilm GFX 50s II, 23mm, f/4.0, 20s, ISO 8000